Monday, October 7, 2013

Mugatu's Pincushion

Once upon a time, there was a guy who thought this was a good idea...


A cushion filled with ground walnut shells and a bowl full of M&Ms with all the brown M&Ms removed a la Van Halen. The cushion is actually sitting on a small box to help cut down on the number of M&Ms that had to be sorted. This didn't really work out very well, especially since I had pins with the mulit-colored glass heads at the time.


So this project will come as no surprise (plus, I mentioned it in another post).


I started with a piece of 2" foam and a square.


I cut out two 8" squares so I could have a block 4" tall. I'm not sure I shouldn't have gone to 10" squares, but I have more to make another one if I'm still feeling stupid later.

Because it was there, I used my little Buck 503 knife to cut the pieces, though I'm sure something like this would have worked better.


To start the pattern, I took the square and drew out an  8" square with 4" sides and a 2" fold under.


I'll need to add something to the "flaps" for seam allowances, but this is the basic form.


Laid over the block, you can see where this is going. For the moment, I just taped the two layers of foam together with the greatest invention since duct tape, blue tape. It didn't stick to the foam so  well (it's blue tape), so I ended up just going around all the way, but it will do for now.

I'm easily amused, but I love blue tape.
For the upholstery, I'll be using this red silk velvet that's been languishing in my closet forever. Despite what they say about velvet, I hope this is easier to sew with than photograph. Probably should have tried getting near a window while it was so sunny today to photograph with natural light, but this is the best I could do.


I'll also need to come up with a way to finish the bottom and attach the feet. Originally I was planning to put it on some sort of tray or something and attach something else in the role of feet, but so far I got nothing. I'll bet Ikea has some cylindrical door pulls or whatnots that would work for this though I like the idea of having some sort of base to attach them  to rather than trying to anchor them in the foam. For now though, I'll worry about making presentable velvet seams.

Once again I guess I did it the hard way. I wanted to make a muslin test of the pattern and it immediately came to me all I needed to do was set the foam block right on the fabric and trace around it. Then flip it up on each side in turn and touch it up with the square to make sure everything's straight.

Next time I'll mark the block and the fabric to make sure it goes back in the same orientation that it was traced off though. It seems that not everything is straight, flat and square on this foam block. Surprise! A little trimming and pressing with the point presser on the clapper and it's getting there. Some thin batting under there might help even things out a bit given the underlying block but the velvet may do the same thing.


Tuesday, October 1, 2013

The Couture Cardigan Jacket, book report

Claire Shaeffer's new couture sewing book came today, "The Couture Cardigan Jacket". All I've gotten done in the past week and a half is one pillowcase, so I was glad for a distraction. "I can't sew today, I'm studying reference materials."


I have her previous couture books and DVDs, but I've been waiting on this one to see what I could use on my Misato (Not) by Chanel jacket project. As expected, it's full of glorious thread marking, basting, hand stitching and pressing on the most terrifying array of super-raveling fabrics and charmeuse!

Some of the chapters such as buttonholes and patch pockets don't apply to my current project, but are still interesting. Here's the chapter I was most excited to see, hand set sleeves.


Ever since Susan Khalje changed my sewing life with hand picked zippers, I've been meaning to give this a try. Between the sort-of plaid loose weave fabric and the odd-angled seams, I think this method will be good for my general stress level as well as the final product.

The book also includes a DVD with chapters that match the book, demonstrating the various topics. I just skimmed the DVD, but it looks similar to her previous ones, so I expect it will be good too.

Saturday, September 21, 2013

A Little More Shinkai

The Shinkai shipments are probably about to wind down, with the last chapter of The Garden of Words manga out next week, but a couple little things came today.

The next chapter in The Garden of Words novelization in Da Vinci magazine. This guy's all like, "Hey girl..."


The novelization is in a B&W insert in the magazine.


And another picture that I can't tell you much about.


While Yesasia is still running their $25 minimum order for free shipping, I did have to find some odds and ends to bring it up. I got the DVD of the video for Sakura Nagashi by Hikaru Utada. I knew it was just a single, but for some reason I thought it would the song (CD format) and the video, instead of just a video. It was an inexpensive filler so okay.

I also got this little book of Children Who Chase Lost Voices From Deep Below.

"Sayonara"

I had been trying to figure out exactly what would be in it, but since I needed another inexpensive filler, I took a chance. Seriously, I need to learn to read Japanese so I can figure out who this is on the cover flap.

Akisaka Asahi, I can now say

Dogs are smart, but I don't know if they can work a word processor. While it's mostly text, this book does have some color pages that appear to be bits from the art books. From what I could make out using online translators, I was thinking this might be mostly art book kind of stuff, but it's more novelization with some B&W illustrations as well. I don't know why I never thought of it before, but this picture of Lisa just made me think of Weird Science.


Saturday, September 14, 2013

New Tests

My mother sent some tags for the pillowcases, to say who they were made by (the group, not me), but they turned up a little smaller than expected, so I had to think about how to insert them. Originally I thought these would just have one end in the seam as it was sewn. The actual tags are a little small with small enough borders, that I don't feel confident about that. Plus, I'm not sure the ends are meant to be left completely unstitched. I didn't want them to unravel down the line.

Rather than make my mother try to attach them by hand later, I'm looking at ways to attach them by machine while in production of the pillowcase itself. I decided to center it inside the band. The band is ripped to length, and folded in half on the long edge, in preparation for attaching to the body of the pillowcase. Once that center line is established, I just center the tag on one side of the band and sew down the ends.

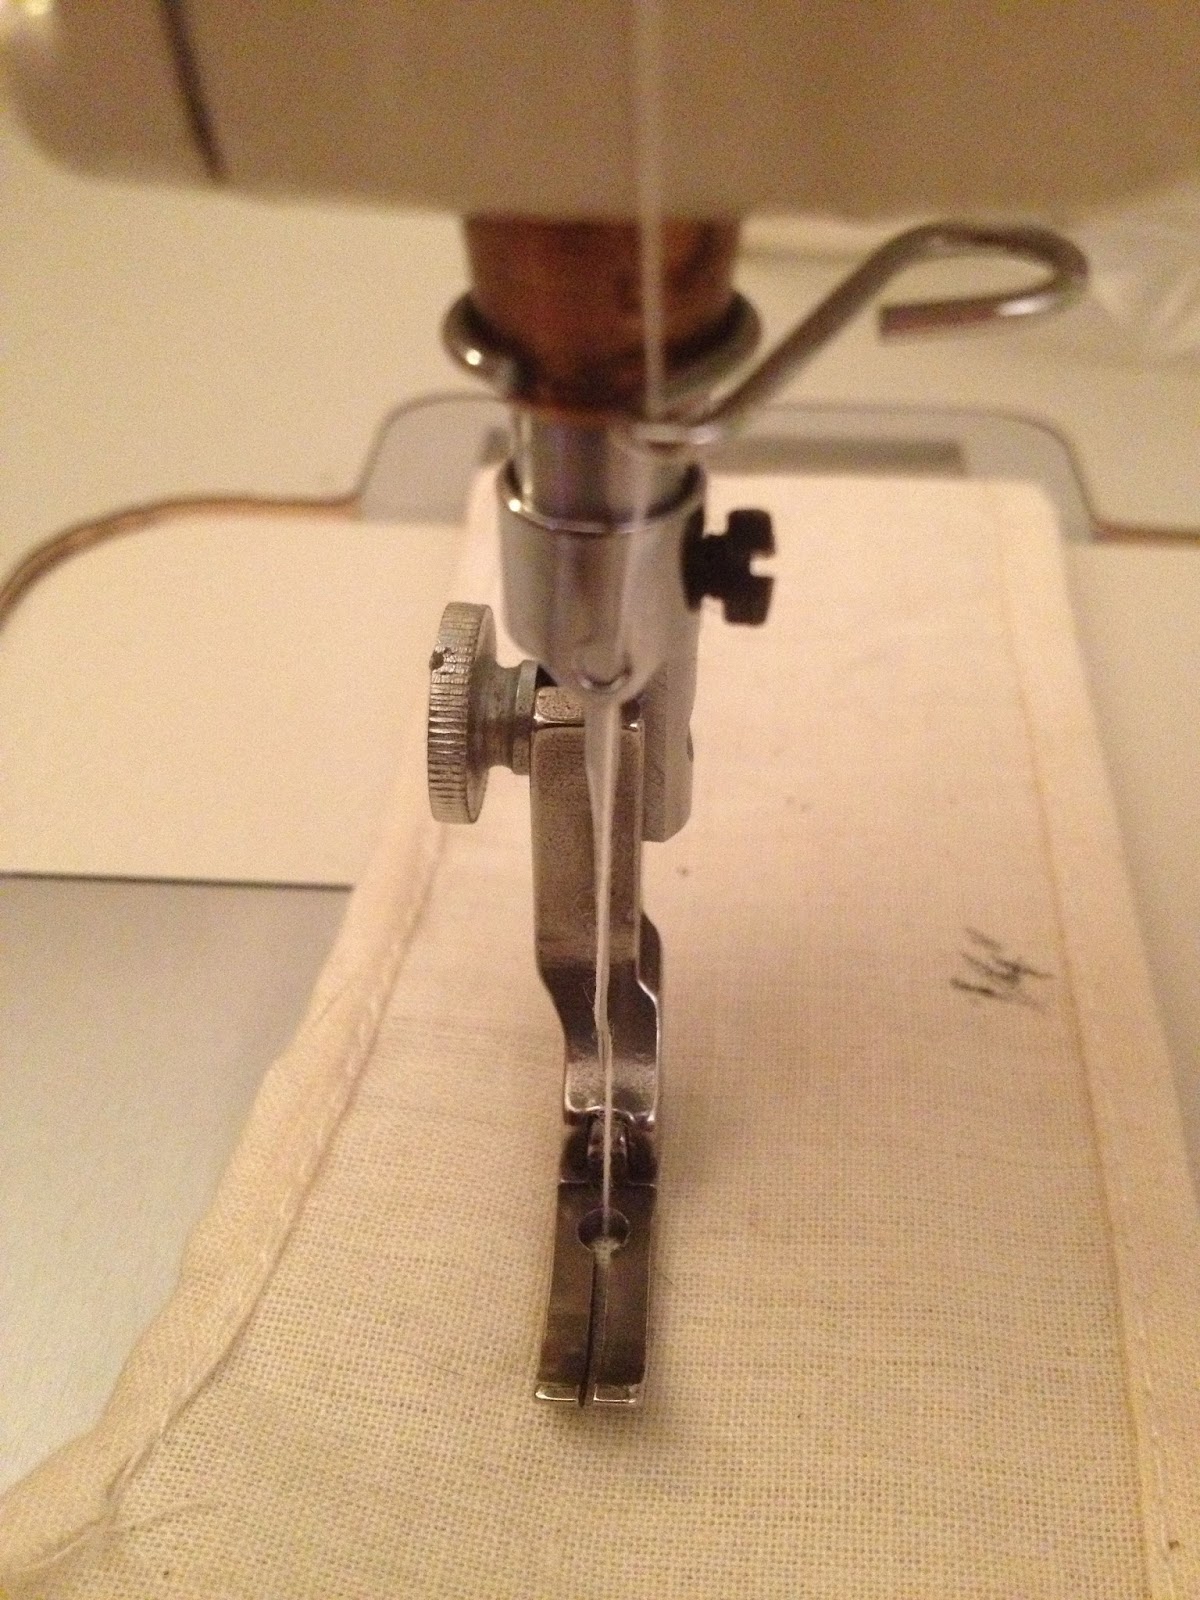
Back to the bag of feet for a narrow presser foot so I can see what I'm saying.


Threads are pulled to the back and tied off and when the pillowcase is finished, it looks like this. I made sure to pay attention to how the band went on to make sure the tag didn't end up on the outside.


I also cut out another pile of pattern pieces for the next Akari test.


Since this was to be a test of the new pattern pieces for the back closure, I ended up doing a test of the test. From my left over pieces of muslin, I ripped up four new pieces, two a little wider than the other two to represent the outer and inner layers planned for this construction. The sections were sewn together at the ends to make two units, and then pinned together with an idea to sew them together along the top edge to connect them.


If these two were the same width, this wouldn't be a big deal, but here one layer is wider, since the center back sections are wider on the outer unit to form the overlap pictured in the manga drawing.

I didn't even sew it, but folded over, you can get an idea how this isn't working.


One of these edges is going to get turned in an unfinished looking ugly way. After thinking through a number of ways of stitching this that didn't work., I came up with the idea below.


In this plan, the center back (CB) sections are finished before the side back/front sections are sewn together along the top edge. This should get the two units connected a good ways around the body, but leave the center back sections separate from each other. That should make the fake closure look that much better, but as always, I'm on standby for this plan to not work exactly as expected.

Tuesday, September 10, 2013

This Boy Caught a Merman

This boy caught a merman. Mer-man! That's an obvious one, but might as well say what everyone's thinking.

The US release of the second "This Boy" movie by Soubi Yamamoto came out today and I had it on pre-order from Amazon so here it is!

 
Originally I thought she was Shinkai's protege, but now I think she was just inspired to get into animation by his work. I always thought this shot from the beginning of "This Boy Can Fight Aliens" was a reference to Shinkai, with the date on the phone and the cherry blossom petals, which didn't show up too well in this screenshot. It's probably just me assuming, but anyway, that's two more blu-rays sold!


This Blu-Ray has a trailer for the US release of "The Garden of Words" with the text in English, but none of the voiceover. I have the Japanese release already and in almost all cases have severe allergic reactions to dubs, so no biggie. I checked a little of the dub on This Blu-Ray, and I don't know what I think a merman is supposed to sound like, but I think they probably sound a little unnatural speaking English. Not a lot of data points to base this opinion on though.

Monday, September 9, 2013

More Books

The Garden of Words manga, fifth installment, came today. Only one more left. I've put the pictures of that in the first installment post. Also, the second of the three books that the internet translates as "I Dream to Protect You", with illustrations by Shinkai. This was out of stock before, which is why it's coming after I got #3.


Someone's Gaze

Someone's Gaze is now available on Youtube! Even better if you speak Japanese! Oh wait, now I see the English translation. That's better!


Saturday, September 7, 2013

Sweeticle, Also the Pencil Sharpener

The CC-2000 sharpener was so great, I also picked up the CP-100, the Sweeticle. These actually come in colors other than black, so I went with "violet". The pictures I took came out more to the pink than the purple side, especially the one of the back.


The smaller Sweeticle operates essentially the same as the CC-2000. The clamping is operated by the small "ear", though on this one, it's more immediately obvious that only one side actually moves. It also has the rubber covered grippers, which is one reason I went with this model over the Angel-5. That model is between these in price and size and available in other colors, but apparently has metal-only grippers that dig into the pencil, leaving "tooth" marks. The Angel-5 doesn't come in any colors I have to have, so I saved the extra $10.50 and got this one.


The clamping section is pulled out first, the pencil clamped in, and retracts as the pencil feeds in during sharpening. The CP-100 has body-colored plastic guide rods versus metal on the CC-2000.


The Sweeticle only has two options for the point, but like the CC-2000, I'm likely only to use one particular setting anyway.


The CC-2000 cutter assembly on the right is made of more metal but is still similar.


The Sweeticle is overall smaller and lighter, being made mostly of plastic, where the CC-2000 has mostly metal parts. I sharpened another dozen pencils and the results are the same. I suppose the plastic model might not hold up as long, but a new cutter/handle assembly is only $7.25 on Amazon, so who cares?

Thursday, September 5, 2013

Carl, the Pencil Sharpener


The Carl CC-2000, the ultimate in luxury pencil sharpening.

This picture accidentally turned out more dramatic than expected. After two fortunately inexpensive duds, this one is a winner.


Here's one you can see a little better. The "ears" on top activate the clamping mechanism that holds the pencil while sharpening.

On the back, there's a selector for five different pointy-nesses. I went right to number one.


One nice thing about this sharpener versus the last several I've tried to use is it doesn't put all the wood on one side and the lead on the other...

Was that too much to ask?
So I spent a while fixing up a bunch of previously sharpened pencils. I have these Black Warrior pencils stacked up like bolts of muslin.


I liked the CC-2000  so much, I also got the CP-100, The "Sweeticle".

Tuesday, September 3, 2013

She and Her Cat, The Novel

I found a third party seller on Amazon (hikari shop) selling She and Her Cat under the title "With Her in Her Cat", shipping from Japan. Shipping was only $3.99, so I went for it. The book came pretty fast and pretty cute.


It made the journey in perfect shape.


And, as usual...

I think it says something about a cat
It looks like She reads Oggi. Now that I could read, but even though The Garden of Words novel is being published in a magazine named "Da Vinci", that one's in Japanese. Well, she's probably reading the Japanese version so... If I read the other book right, She is also reading "Papa Told Me" which the internets tells me is a manga about a girl and her widower father.

Akari's Wedding Dress

It's been a while since I worked on the Akari dress, so I tried to make a little progress over the long weekend. I kept going back and forth on how the back is going to come together, so I started with the front.


After re-reading my notes on the Grace Kelly dress, that this is supposed to be an R&D project for, I ended up coming up with a four layer test plan. The four layers will actually be two layers. One, an outer layer made up of four-ply silk underlined with a fabric to be named later. Two, an inner layer made up of two layers of cotton.

The outer layer will have a phony closure made up to resemble the drawing of Akari in the manga. The inner layer will have a separating zipper to reflect, more or less, the underbodice unit of the Grace Kelly dress.

For the center back, I started working over the pattern pieces to account for the phony closure. That part will be 2" wide, centered on the center back. To modify the pattern pieces, I had to draw in the closure. On both the right and left center back pieces, I drew lines parallel to the center back line, 1" over in each direction.


On the left side, this should become two pieces as noted above. There's a good chance of this become several pieces, so the "closure" becomes a separate flap. The right side will be extended in width, but I'm not sure if this will make it look more like it's two sides, buttoning up as-if it were a real closure or screw it up because it will look like things don't line up. I need to draw it out on paper some more.

Okay, I thought about it again and that flap idea was wrong. The overlap version is the correct one.


Sunday, August 25, 2013

After the Fact


Why am I making the same thing again and again? Because I have to work through the things that are obvious after the fact. It's also good to practice when the final garments will be made of all sorts of fancy silks and laces. And by fancy, I mean, I don't want to have to buy all that stuff again!

While I cut all the pieces to test other stuff, like the armhole adjustments, today's sewing focused on the zipper. Here's the "under" half with the zipper in it's approximate placement along with a piece that will become the "extension". It occurred to me, since this is Misato (Not) by Chanel, that I might use the selvedge here to help cut down some of the layers. The extension is to be attached and turned back so that the selvedge becomes the point inside that meets up with the lining.

It looks like a ripped edge, but the selvedge was fringy on this bolt of muslin.
The zipper needed to be basted in place before attaching the extension, since it will be sandwiched in along that edge.


The extension is pinned in place. I had pressed it over while I was messing with it, but you can see here which way it will go.


To sew along that edge, I went to the bag of feet and found something appropriate. This foot has the hole to the side, or rather, it doesn't have both sides,so the hole and thus the needle, can get way over there despite the zipper teeth.


Simple as that! When I turned the extension to the inside, I ended up just catchstitching it to another seam allowance. On the actual garment, I'm currently assuming it will be fell stitched to the lining fabric.


On to the "over" side. Here I'm basting the zipper side to the "extension facing" so that when it gets folded back, the zipper will be right to match up to the "under" side.

Here's where "obvious after the fact" gets sewn in place.
Next comes the "real" extension facing, sewn on sandwiching the zipper in place.


The "real" facing gets turned back away from the zipper, getting ready to turn the works to the inside.


Here it is, turned to the inside, so that the zipper sits inside the outer edge and to the back side.


When I was putting this together, I did it such that stitching wouldn't show on the front face of the jacket. However, when I tried it on Lucy, I realized that the outer fabric, while creased to form that edge, could easily pull back, exposing the zipper underneath. So I says to my self, Self, what would Susan Khalje do? And so I got out the needle and thread and pickstitched it in place. This would probably be good for the final garment too, since with the raw silk, you'd have to do a pretty bad job for it to be noticeable.

I meant to do that.
The last test collar was still pinned to Lucy and I left it on, but I imagine it will have to come off as I work more on this. I folded under some edges just to look at, and all the pressed but otherwise unaccounted for seams make this a little messy at the moment.


Zipped up though, here comes the obvious thing. The "over" side zipper half needs to be moved back from that edge 1/2" or so. I like the placement of the "under" but the "over" should be covering that seam. Also, with zipper pulls like these, if you don't allow a little something for it, it's going to be sticking out. Overall though, the test went well enough. Next up, the fun of setting in sleeves and thinking about how to manage all the odd seam allowances in this thing.