Wednesday, June 19, 2013

Another Bodice Test

I tried to see if I could make the fold-over thing work on this bodice, but the combination of the two peaks and a valley, plus darts, just didn't get it for me. There might be a chance on the Grace Kelly, where the underbodice opens in the front, and would just be two individual peaks. Maybe I'll try that later.

So I just gave in to the notion of making a front, a back, sewing them together and understitching to the keep the back side from trying to get to the front. More muslin was ripped off the bolt and traced out some pattern pieces. Two front bodice pieces and four side/back pieces. Later, I would remember that if you have two front pieces, that have two sides, you might want a total of eight side/back pieces.


I went back to my pressing the fold into the darts before sewing in place of basting. Probably not a great idea for "good" work, but gets the job done here. Also as before, thin metal Ezy-Hem gets hot when you iron it.


After sewing up two bodices and pressing the darts in opposing directions, I pin right sides together this time and sew around three sides and a little of the bottom. Seams are clipped to help with the pressing. By this time, there's a good bit of curvishness sewn in. I spent a while working it over and over with the ham, the seam roll, point turner and Ezy-Hem, there's a lot of shapes here.

Yet another "I know it looks like a mess now" picture
After turning and pressing, I start to test it on Lucy. Are you not supposed to vertical steam with a gravity feed iron? I gave it a shot, cause muslin wrinkles like it wants to be linen when it grows up. There's a steamer in the basement, but this room is small enough already. On the front to the sides, I'm getting good matching with the seams on the dress form cover. The top darts and long darts hit the princess lines and the side seams hit the side seams.

Getting there

As we get around the back, here's problem number whatever. I made the side/back pieces from some draped bits that weren't made to the same size as the front bodice piece. That is, they mainly captured the shape above the waist, but for this, I needed to match the front piece all the way down. It was okay for this test, but I'll remake them later. You can see here that it  doesn't hit the form cover seam between the side and center back. The edge extending past the center back is intentional, as I'm still puzzling out what I want to do for the rear closure, and will probably want  something to overlap. It would be more obvious if there was two sides to the back.


Tiers slapped back on, I don't like the placement again, but I've got some thoughts about what I might do with that part that's going to require some new draping and ruminating.


Tuesday, June 18, 2013

Steel Tipped Steel

Add to the list of things to do, find the rest of the tips for the steel boning. But I put my eye protection on and tried cutting a piece off one of the rolls. I read somewhere that you can just cut one side of one spiral and the section will come right off, but I found the bolt cutters I bought weren't conducive to being that fine about it. Not that it mattered, but I'm not sure if this steel is not that hard or the cutters were just overdoing it.

Rather than using needle-nose pliers, I used the linesman's pliers for the flat sections, watching not to let things slide into the clipping section of the jaws. A quick squeeze to bring in the legs of the "U" shape and then one to across the flat side to flatten it down, and ta-dow! And add to the list, narrow ribbon to make casings.


Tuesday, June 11, 2013

Nooooo!!!

"We're sorry but after repeatedly checking with our suppliers, we have found that the following items in your order are not available at this time. As we are unable to source these items for you, we have removed them from your order."

So part 2 of The Garden of Words manga and the "One More Side" 5 Centimeters per Second novel shipped but no She and Her Cat. I guess I'll give figuring out ordering from Amazon JP one more chance (get it?)

Wednesday, June 5, 2013

Getting closer

As I work on bodice construction tests that don't produce anything worth photographing, I can now listen to the Motohiro Hata album. I also got the book version of 5 Centimeters Per Second. Can't read it, but Ima put it under my pillow and see if osmosis works.


Monday, June 3, 2013

She and Her Cat, the book

That's what I'm pretty sure this listing at yesasia is for! Release date is the 19th, maybe it will be available for pre-order before then. - Oops, at some point this morning, the Notify Me button changed to Add to Cart!

Amazon JP is showing this book too which is either the art book for Garden of Words or some kind of fan book about Shinkai? Release date is the 21st, same as the blu-ray, so I have to get searching for more information even though there's about zero chance I won't just buy it...

Sunday, June 2, 2013

Ham

Back to bodices. I traced off a few upper edges and tried to think about what to do with them.


In place of basting, I just folded the lines together, hit it with the iron and then  sewed.


Since these are darts, I pressed them on the curve of the ham to give them the shape and to make it easier to get that transition from the point of the dart to the smooth fabric that should be after it.


The picture might not show it so well, but I just went ahead and sewed two together with the darts pressed to either side of the line, for general flatness. Putting the two curved pieces on the lines was a little trickier, but not too bad. If you think of the black line in three sections, you can sew from one to the next to the next with a minimum of turning. This helps to arrange it flat at each turn as you sew.


Guess who sewed wrong sides together? I could swear I had a reason at the time. Then out came the pinking shears to trim away the excess for turning.


No real reason to use them on this test, but they were there. They will probably get used on the real dresses some since there will be no serging. WWSKD?

It seems like it won't cause too much bulk to have these points here, but there's more to think about.


Looking at the piece on Lucy, I noticed the seam allowance through the muslin, and got to thinking that maybe running some petersham or something along that edge would help with the clean edge. It could also provide something to understitch to on the inside to keep the seamline out of sight.


Of course, this would probably also involve a band/facing of the outer fabric on the inside to attach the lining to.


Ideally, I would just fold over a wide allowance on the front piece to make a facing of sorts, but I just don't know if this can be done in a way that's clean looking inside and out. There should be some old clearance 4 ply silk crepe around here so maybe I'll try making up a front bodice test to see what can be done. I think the ribbon defined edge sounds like a good idea but I think the folding and mitering of the fabric is what will determine the final choice. I would trade some non-outwardly visible seaming choices to get that clean top edge I think.


Tuesday, May 28, 2013

Rain!

I just noticed the Motohiro Hata Garden of Words CD is "ready for shipping"! The last things I got took more like 7 than the previous 10 calendar days so it should be here around this time next week. Still almost a month til the blu-ray drops, but I'm watching this Japanese itunes link, cause I still got this gift card credit and online translators have led me to believe it will be available there on Friday. On standby for itunes to not have it or not sell it to me in the US.

I thought this blog was about sewing. I did find my bodice muslin pieces along with a couple more bolts of muslin so now that I've hit my pillowcase quota for the month, I will be back to trying to figure out stuff.

Tuesday, May 21, 2013

Oops

By this time, I was supposed to have made progress on the Akari, but while distracted by another round of spring cleaning, I guess I threw away my bodice muslins. Oh well, sounds like a plan for the holiday weekend. Anyway, the first pillowcases were reviewed and approved for normal production. My mother sent a box of assorted fabric and I have started prepping it for a long serging session.


Also in the box were a couple doodads and buttons looking for holes. She sez she doesn't know anyone that can do a buttonhole. Now, eventually it occurred to me that I wasn't doing these because someone doesn't own a sewing machine... That's okay, cause I love this buttonholing contraption!

To set the size of the button hole, the attachment has an adjustment like this. Move it down to make a longer buttonhole.


It only goes up to 1" so someone is going to be left out.


At first I thought the markings on my Harbor Freight table were off, since the smaller button seemed bigger than expected, but it turned out I failed to operate a tape measure properly. Measure twice, cut one, thank you.

 One 1" buttonhole coming up..


Looking at the hole, I could see it didn't have the satin stitch prettiness of my Singer, which got old and moved out on its own one day. Oh, the manual is right here and sez if you want to make longer buttonholes, you got to set it to make more stitches.Turn this screw an unspecified amount clockwise to do so.

That screw in the middle
This looks like one hell of a mess, but this is what you get when you turn unspecified amounts as you go around. Wherever I left it should be right though.

I always say, it's okay it looks like this.

Sunday, May 12, 2013

The Garden of Words, preview

Someone posted the first five minutes of The Garden of Words that was shown on Japanese TV. It looks like the manga I got and also has no subtitles so I'm still waiting for the blu-ray to come out in June to know what they're saying...

Oops, that video went away, so let's try something else.


Wednesday, May 8, 2013

The Garden of Words, Manga

The Garden of Words, or Kotonoha no Niwa, manga has been serialized in Afternoon magazine, from June through the December 2013 edition. There may be another chapter in the December issue, or it might just be an ad for what appears to be the trade paperback collection coming out next month but will have to wait for that issue to get here from HK to see. I put the book on pre-order with an expected release date of 11/22, so it probably won't get here before early/mid-December. Oh wait, just got an email saying delayed to 11/29...

Too bad I can't read a word of it, but the first installment of the manga is here!


Oh wait, I had to look up kai, but otherwise I can now tell that she is asking him if they've met somewhere before, as opposed to the movie, where he asks her.

A few color pages to kick things off

Second installment


Third Installment


Putting the bill in yen just makes shoe school seem so much more expensive!


Fourth Installment


Fifth installment on the way. From what I read, there will be six total.

Someone's going to lay the smack down in part five...

Fifth installment!


I'm going to say this is a flashback to Yukino's time as a teacher. I'm not sure what that girl's saying but those are some mean looking speech bubbles, so it's probably not very nice.


Of course, Akizuki "drinks beer and falls down" in this chapter, but it ends with him coming to Yukino with his lines, "Even if rain comes not, I will stay here, together with you." So the last chapter will mostly be happy for him...

Sixth installment...


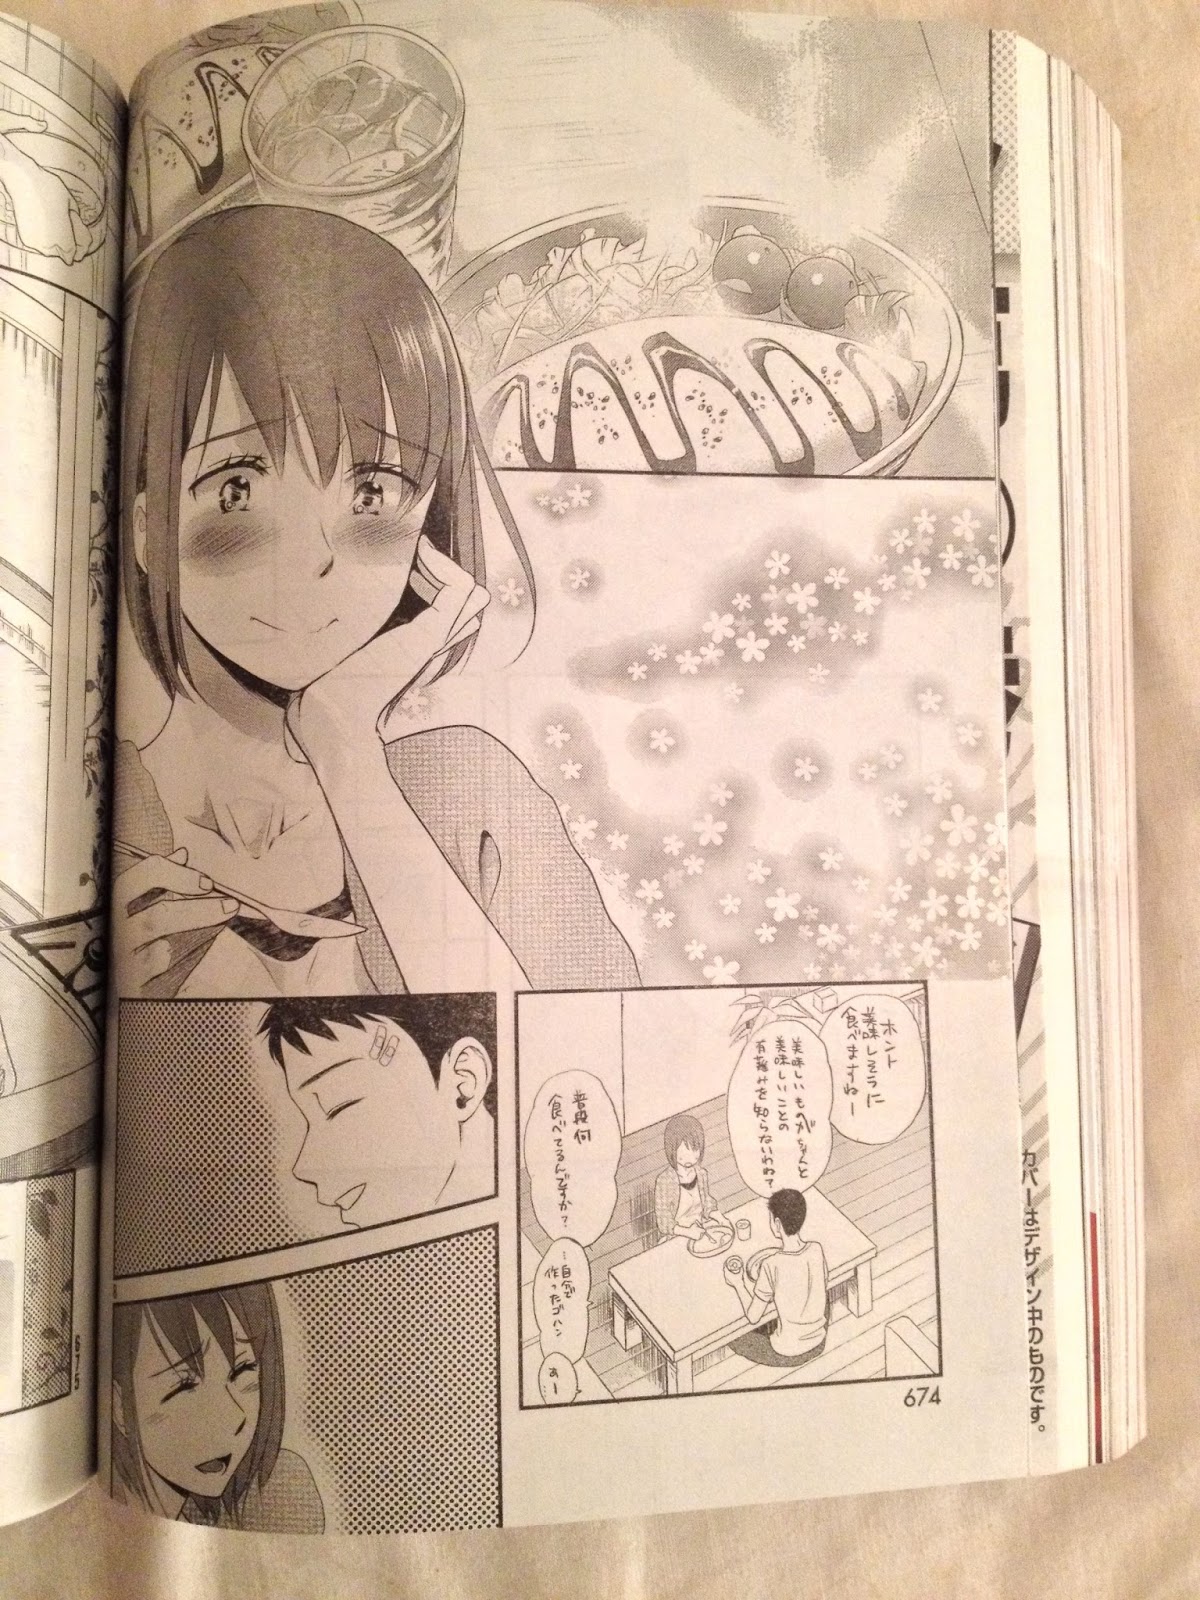
That is one awesome omelette!


If I could read this, I would know why it seems to stop short! Does it say, "Buy the blu-ray!" or does it say, "See our website for the conclusion!" or does it say, "Be sure to drink your Ovaltine!" I don't know!


The Seventh, and I'm pretty sure, Final Installment!


This week, I can read the frame below! In the movie, I really felt the voice actor's work, and it was my favorite bit since Mari yelled "Point blank, sh*thead!" in the English dub of Eva 2.22. And that's actually saying a lot more than it sounds like, cause I have an irrational aversion to dubs for a guy who can't understand Japanese!


The last panel is a nice extension of the movie. It's to the right of the ad here for the collected book version coming out in about a week. Google translates it to "I can walk forever." and Bing says "You could walk to everywhere." Like Spock talking to the space thing in IV, I can make the sounds, but I don't know what they mean.

Amazon JP has a nice color picture of the cover, but no "look inside" preview yet. YesAsia claims they're shipping mine on the 29th, so it will be a few weeks before I get it.

The book is here, see this other post for a bit more on it.

Sunday, May 5, 2013

New Threads

Also this week, the new serger thread showed up. The serger construction is similar to the other method, in that you rip off 10" and 26-1/2" sections of fabric and sew the together in a similar order, but without the roll-up or second pass on each seam. Instead, you fold the 10" section wrong sides together on the long  edge.


Then match the ripped edge one edge on the right side of the other fabric and serge.

Yeah, that's the wrong side showing now.
Then fold right sides together and serge the long edge and the other end closed.


And I got some other fabrics, in case not everyone is into wizards n' lizards.


This is a lot faster, but if they could push Mother's Day out another week, it would really help. Thank you.

Fine Day

The first of my pre-orders came in last week! I got the "limited edition" release of Fine Day by Kazusa. The CD has the theme song from Shinkai's "Someone's Gaze" short along with a DVD with a video to go with the song. The short is supposed to be released somehow, sometime, but since it doesn't look like it will be on "The Garden of Words" release, I don't know when. Given that it's probably not much longer than the video for the theme song, I'm not sure why it wouldn't be on one or both of these, but then I don't know what obligations they have to the Nomura folks either.


The manga version of "The Garden of Words" just started in Afternoon magazine and should be here any day now. I suppose I'm just buying it for the pictures, since I read no Japanese, but it will make more sense after the blu-ray comes out... Of course, the whole thing will be broken up over who knows how many 800+ page issues, so by the time it's done, I guess I will stack them up, put a roof on it and live in my new book house.

Thursday, April 25, 2013

Hot Buttered Sole Plate

I was surprised that a quick search didn't turn this up as a commonly used sewing blog title. In preparation for making up more pillowcases, I ran another pass through the serger and hit it with the iron as I normally do with the sewing machine. At first, I thought it was missing stitches, but then it hit me. The "missed stitches" are now glued to the sole plate of my iron.

You should see the other side.

Looking online, I guess I'm not the first to melt this thread so I tested the CTS thread and it was fine. Too bad I went with 1 of each color the last time, instead of just a bunch of black and white cones, so I'll have to order more so I can have groups of 4 matching. In the  meantime, I'll have to pick up more sole plate cleaner and some elbow grease.

Wednesday, April 24, 2013

Mass Production Pillowcases

Finally, I tried out my serger. As it turns out, I just passed the 5 year anniversary of its purchase. Oops! Well, I had bought the basic 1034D to give serging a try and now I have.


I also had a bag of Maxi-Lock thread I had picked up on sale somewhere, a bunch of colors, 4 cones of each. I also looked at CTS USA, where I bought all the thread for the Juki 8700, and it looks like I went with a light thread that is what they also sell for sergers, so I have all those 12,000 yard cones too. To try to learn how to thread this thing, I immediately pulled off the color coded thread spools it came pre-loaded with and read the FM. Only took two tries, and we were in business. It takes regular home sewing machine needles, so I'll have to find a deal on those, since I only have a pile of industrial needles.

Ta-dow!

Now I'll go back to the manuals and video CDs and figure out how to mess with all the settings.

Sunday, April 21, 2013

A Case for Pillows

Today I finally got around to making some pillowcases. Using these instructions I made up some nice french seamed pillowcases (pdf instructions at link under the video).

The fabric I have is in the 42/44" range so after pre-shrinking, I used it at its current width and just tore off 10" and 26-1/2"  sections by type. Just line the two pieces up, right-sides together, along one long edge.


Then start rolling up the longer top piece, like this...


And roll the shorter bottom piece up around it to make a tube-ish roll and pin for sewing.


After sewing a 1/2" seam allowance, pull out the fabric as shown in the instructions (I forgot to take a picture each time.)

Unrolled, Shazam!

Pin WRONG sides together and sew a 1/4" seam  allowance. Here my lizards fabric is actually a bit wider than the wizards fabric, leaving an overhang. The important thing is just to line things up and sew accordingly. The additional width will be cut off later, so just sew as if it wasn't there. Here, you could actually guide on the edge of the printed section of the lizard fabric, since it overhangs by the width of the selvedge.

Wrong sides together, ready for 1/4" seam

Now, if you look at your layers of fabric, you might have some parts not 100% even (could be not the straightest cut, whatever). To make sure I got everything in the seam, I put the "shorter" side on top for visibility of that edge. But then the 1/4" guide line on the throat plate is covered. However, the side of the presser foot gives you the same guide.


Good pressing is one of the top things you can do to make any sewing project come out really nice, and with these french seams where you sew one way, turn and sew back over to enclose the previous seam, it really helps. I used a combination of a sleeve board and an Ezy-Hem. First I would press over the seams with the help of the sleeve board and then put the thin Ezy-Hem inside to help hold the edge of the turned seam while I pressed it sharp. The Ezy-Hem, being a thin piece of metal, can  really get hot using it for things like this, but I do it anyway. You should be careful in case you're not stupid like me and are more careful with hot metal objects!

This gravity feed iron has what I'm told is supposed to be a guard or heat shield, but damn this thing gets hot after a while too!


Finished seam is clean like this.

If you're careful about matching your pieces while you sew, you should end up with a nice match like this. This cuff end is the part that really shows any mismatch, so pin and sew carefully when you're sewing the first step of the french seam on the long edge.


This makes a very nice pillowcase, though after making a number of them, I'm reminded that my mother says the other ladies normally serge their pillowcases, like you see on a lot of commercially sold cases. I'm also reminded that I have a serger I've never used, having bought it around the time I realized Susan Khalje had a wonderful plan for my sewing life.. For the time spent, I should probably go for the method that seams, trims and finishes all at once. As an Operations kind of guy, I recognize that unlike my other projects, which have no practical use and can take forever, this is something someone could actually use and should completed in a realistic time frame!