Wednesday, July 31, 2013

Mail Call

The latest dose of  Shinkai stuff showed up this week. A spare copy of Memories of Cinema and the latest issue of Da Vinci magazine, with an article about the notes that became The Garden of Words. Part 4 of the manga is on the boat over here now.

I guess it's not The Garden of Pictures, but that would make it easier to read...
My new pencil sharpener came, and while I thought it would be similar to the one that died, I was mistaken. I went to the store to try to pick out a better one, but it seems they take the cutters out of the display models and it's a little too involved to take one out of the box (if it ends up I don't buy it and have to try to put it back).

The new iron came, and I love this packaging. It makes it seem so fancy!

Not just "a" steam iron!
It's only 1000W compared to 1600W on the Rowenta I iron my regular clothes with, but this thing will heat your house and give you a hell of burn on your arm!


The separate water and power take some getting used to, since one goes under and behind the ironing board and the other up and over to the side. I wouldn't mind trying one of the boiler type industrial irons for the single hose, but the one that I tell myself I "need" goes about $600 and I remain able to talk myself out of it.

While making one of my infrequent checks to see when Zoolander is coming out of on blu-ray, I discovered there is a UK release. Third party sellers were selling it "fulfilled by Amazon" at a decent price so I ordered it. While watching it, I was reminded that I have a nice piece of red silk velvet in the closet just waiting to be turned into this... It's probably not as cool though if I don't have someone to stand around holding it.

It's fictional, if not a garment

Sunday, July 28, 2013

Fun With Irons

While waiting for this pot roast to slow cook, I spent the day sewing up new test garments. A new sleeve draft was made, based on the basic dartless sleeve. Pretty much just straight down from the end points of the shoulder, but I did taper it a bit thinking that looked really wide. I also redid the collar pattern, to be longer and taller.The back was also redrawn as one piece.


The first thing I did was to burn my arm with the iron. Right where my pincushion goes, so that was inconvenient. And then I absentmindedly scratched it. Once...

First, I worked up the Akari bodice. Twice, really, so I could have the inside and outside. It took a while, but with enough pins, it wasn't too difficult.


I had a hell of time pressing it after this point, but eventually got it on Lucy.


Once again, I realized I need to shave off some of this one corner. Last time, I wasn't sure if it was the pattern or just sewn that way, but I'll tighten it up next time.


The back worked out well enough. I need to narrow a section or two just a bit, though once again, I'm not sure if it's the pattern piece or just sewn a little large. I'll probably narrow it just a bit and keep watching the sewing. With this kind of fit, a little difference stands out a lot more.


I have to adjust the center back pieces for the actual closure anyway, but things are lining up close enough to Lucy's guide lines to consider this a nice improvement.

I got the Misato jacket together similar to the previous trial. That is, sew the body of the jacket together then slide on the sleeves and pin on the collar. I folded some edges under and left a "seam allowance" on the collar so it could be pinned below the collar line, under the jacket. I thought this would make it sit a little more like it would if it were sewn on. I guess it worked, but on the next test, I think I will sew it all up and also see if the sleeves really are heading in the right direction.

Getting dressed
I think I went a little too long on the collar, since it should reach just to the edge of the front piece rather than to the opposite shoulder seam. I do think I like the extra height on the collar though.


For the back, right now I'm going with this one piece back and will make the center "stripe" just a bolt on. I was thinking about making it three pieces, but I couldn't think of a good reason to do that.


The center piece will probably just be a strip with edges folded over and sewn with one of these feet. These should keep the edgestitching on track.


As it turns out, the answer to the question, how many times can I drop my iron on the floor today before the water starts coming out of places water isn't supposed to come out of? is two. I'm sure there's a gravity feed iron joke in here somewhere, but I'll think it up later after I order a new one.

Thursday, July 25, 2013

The End of the Roll

I've been meaning to make a new bodice test on the Akari with the new pattern pieces and finally I got around to cutting the parts out.


This time, I made sure to cut two pieces each for the whole way round. Of course, this time I have left and right back specific pattern pieces, so it was easier to remember.

And I found this! This is what the center of a bolt of fabric looks like!

Yeah, I know how "interesting" this actually is...

Wednesday, July 24, 2013

Cutting Mat

After reading some articles about using tagboard for pressing templates and "permanent" patterns, I thought I would finally get a cutting mat. I've had a rotary cutter and a pile of replacement blades since a Black Friday or whenever they were on major sale. I think I always thought of them for quilting, but everyone seems to like them, so I'll give it a try. For the templates, I assume I'll use an xacto knife. Either way, I wanted a mat for cutting. I thought about getting a larger size since 24x36 didn't sound that big, but when I saw the box on the porch, I was all like, what the hell is that?


Sunday, July 21, 2013

Sleeve Test

As expected, the pattern version of the sleeve head I went with ended up with a lot of sleeve versus the armscye. I opened up the seam from the wrist a bit to be able to pull it up. Knowing I would be widening that end of the sleeve anyway, it was better to check the rest of the fit. I just fit this by folding back at the stitching lines drawn on and pinning as if it were sewn on.

There might be a bit of an issue with the way Lucy's arm fits so close to her chest, but either way, it was obvious the sleeve head needed to be shrunk a bit. I took the original draft and copied it off using the original narrower lines.  I also added a little width at the cuff end. I'll have to do another adjustment and when I do, I'll have to be more careful about the blending of the non-dart side of the sleeve. After the dart is sewn, that side gets more of a shape that will need to be matched for easier lining up of the stitching lines. I gave that side a quick move and just used the square to draw the lines rather than the curved ruler. Even with a bit of a turn at the elbow, it took some "easing" to get it together.


This time, I went ahead and just made two sleeves, even though I figured it was only going to be #2 of ??? iterations of the pattern. It still looks bunched up under her arm, but that's as much a function of the way her arms attach and the fact that they're just pinned in place. Looking at it here, it's definitely a step in the right direction though.

This time, I noticed that Lucy's right arm is thicker than here left. Her right forearm is as if her palm is facing the floor and her left as if her palm is facing the wall. That is, the right is wider across and the left has the width vertically. Think about how the bones in your arm work and it might make more sense than it sounds like. Once I widen the lower sleeve again, it shouldn't matter anymore.

A new collar was made out of some scrap muslin. I just extended the existing collar rather than redrafting/draping according to the larger circumference line I laid down the other day.


I extended each end 2 inches, so that they would reach to the edges of the front pieces. I think I might try making the next test a little taller. Hard to get it to stand up for pictures, being two pieces of muslin and pinned in place around the outer edge.


The vertical line on the "R FRONT" piece would be the edge of the front. I didn't turn under that edge, but that's the line of the edge of that side of the jacket front, behind which a zipper will run. The collar will not be attached all the way to that edge, but only to a point probably not quite back to the shoulder piece seam.

I've drawn up a new one piece back pattern incorporating the step-down on the hem. Once I get sleeve pattern #3 drawn, I'll probably try sewing  up a test garment with everything actually sewn on to see what's what.

Wednesday, July 17, 2013

New Fabric Choice

Was this the right call? I don't know, but I think I will feel more and more like yes until I try to actually use it. Then who knows! There were some other contenders, primarily some black cashmere, but I went with this. I saw some nice red wool crepe, but decided not to go red, too close the "real" thing. There was some nice Valentino wool fabric, with a nice pattern woven into it (all black) but like some of the nice silk houndstooth I saw, I couldn't get comfortable with how it would all lay out and look in the end.

I got this raw silk and in the store, I thought the plaidishness wasn't obvious enough to really be a factor in the garment. Looking at this picture, I'm not sure, but it may be the ol' trick of looking at something too close up and out context. Either way, I got enough that I should be able to make the jacket twice, assuming as always that something stupid will happen with the first.


Tuesday, July 16, 2013

Sample Arm

I snuck in a quick sample arm today. I was concerned about the way the cuff was drafted, and it did prove too small at the end. Most of the arm was fine, but even Lucy's handless arm couldn't quite make all the way through. No big deal to adjust that part of the pattern. The jacket has loose sleeve ends, with zippers, so I'll just open things up and note a spot for the hardware.

Close enough for today

Monday, July 15, 2013

She and Her Hamster

The third installment of The Garden of Words manga came today. There are a bunch of series in this "magazine" and I saw some English parts in one. No pictures of that one though (hellooo cartoon boobs). Also in today's delivery was the video "Egao" also by Shinkai, from 2003 (song by Hiromi Iwasaki). The "She" in this video bears a resemblance to Mikako in Voices of a Distant Star, which seems natural given when it was made. I can't read the Japanese subtitles on the DVD (found English online though) but did try all the menu options and found a nice short about the making of, which had no narration which was no loss on this. It was nice just to see all the steps being built up into the final product.


Sunday, July 14, 2013

Sleeve

It's about time to start spending the latest batch of vouchers and so I needed to come up with a plan for what fabrics to buy. I took the basic pattern pieces and thought about a cutting layout. It looks like it could work with the two yards of Chanel fabric I have, but it's going to be close and so I figure I will save that fabric for a different project. No idea what will go in its place, but we'll see.

I've laid a new tape line around Lucy's neckline, out a bit to put a little more room in the collar but haven't made the new pattern piece yet. After consulting the draping books, I found that they mostly call for drafting the sleeve and then adjusting the test piece. I tried to use the Mistao body pattern pieces to check the measurements and drafted away.


I picked the "jacket" variation from the book, but left the basic draft lines since I think the books means suit jacket not outerwear. Still, both should be fitted and at this point, there's not much styling put into the pattern. When the test gets done, I'll mainly be looking out for too much ease. I don't want to have to be stuffing too much sleeve into that armscye.

Monday, July 8, 2013

Memories of Cinema

The Garden of Words art book arrived today!


I had trouble getting pictures of the pictures, since it didn't want to lay flat and I didn't want to force it to. If you can read Japanese, that would be a bonus with this book, but I'm happy to have it anyway.


Sunday, July 7, 2013

Rubbernecking

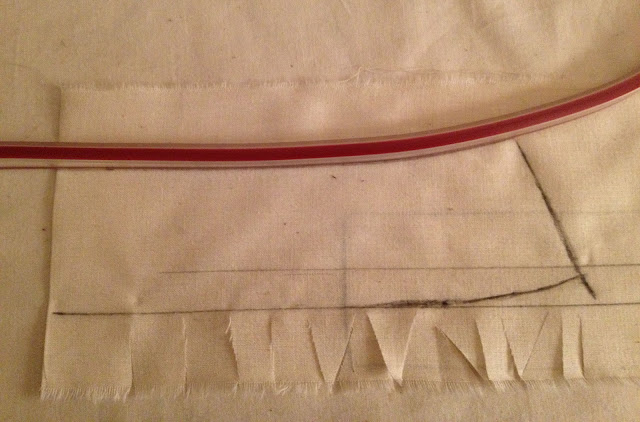
While I read up on draping versus drafting sleeves, I decided to avoid that and work up a quick collar piece instead.While Misato's collar seems like it would be just a matter of drawing a rectangle and bolting it on, I ended up draping for a mandarin collar, to get the shaping to the curved neckline. Consulting the books, I went with a method that called for marking out some grain lines, based on measurements, so I got this out.


The nice thing about the flexible ruler, is that this method established the neck line,but then you have to draw in the top edge to match at the appropriate width (I went with 2"). So you can just do this, match the curve and move it..


The test collar seems to be on the right track, though it will need to be adjusted. It will need to wrap around further and I need to mark the pattern to reflect where the "loose" ends start. This is just the basic neck measurements. I'll probably expand the "circle" a little bit, but I'm not sure by how much. I can't go by the pictures, cause Lucy has a neck that could theoretically actually support a normally shaped human head.

I normally don't believe in cutting on the fold.

This picture looks like hell again, but at my house, the thing actually looks like a uniform width and all that good stuff. If I can figure out what I'm learning here, I can some day hope to work for a fishing magazine.


The Easy Part

For this test, I just did a "Cut 2" but for a jacket like this, Lucy's symmetrical enough. This time I made note of right side versus wrong side though. I decided to call parts left or right based on my left or right as I look at the form. For the shoulders, it seems I went with as viewed from the front.


WWSKD? I think for matching the curved edges of the shoulder pieces to the front and back body pieces, I'll have to try hand basting them next time. This time, I used pins and given the way they have to be held together, I could hardly pull them out before sewing over them. Fortunately this is before I culled and replaced a bunch of pins from the old pincushion. Time for a new needle.

But what do you know, when I tried it on Lucy, it came out pretty good. I took some pictures, and they mostly looked like hell. Turns out you (the you you, not the we you) can't see how well seams actually line up with the form, plus one layer of muslin doesn't hang well, so as soon as I stop messing with it to take a picture, it looks like hell.

Step down at center back to be added later.
The fun part comes next, where Lucy's arms go back on and we see if I can drape a sleeve into this.


Friday, July 5, 2013

Anatomical Corrections

To translate a picture into a pattern here, I have to account for the differences between the proportions of Lucy, who is a dress form based on human measurements, and Misato, who is cartoon character. And I don't mean that in a Joan Holloway sense. Rebuild Misato is a little better, but TV Misato, whose picture I'm mostly going by, is getting into "orange on a toothpick" head and neck territory. So I can't exactly line up style lines with anatomical landmarks, but I'm making a bit of a translation.

For the shoulder, I lined up with grain with Lucy's shoulder seam and then worked to fit to the cotton tape lines. I was thinking maybe I shouldn't fit this so close, and there's probably something to that, but then this also goes a long way to defining the armscye which should still be pretty fitted.


For the front, I lined up on the center line, though really this edge should be lined up on the left hand corner of the little plateau. That's okay, since that is just an extension of sorts and can be drafted on when I transfer it to paper, or just added as muslin pieces are cut out. In order to give some shape,  a dart is placed in the usual bodice dart location. I kept it smaller, since what it should do is give just enough shape to cause the lower portion (below a horizontal line through the bust point) to hang straight. As it turns out, this is the location of the inverted triangle and stripe detail from Misato's jacket. I think that detail will ultimately have to be some kind of trim, since the dart only goes up so far, and has no width visually. Here it is in process.

I get tired standing here all day.
I don't know why she looks like she's leaning over. Here is the first pass at the pattern piece. The side seam looks off at a diagonal, but once you close up the dart and wrap it around a torso, it should match the side seam vertically. I didn't get to make a back piece, though that will be even easier, since it just has to hang straight so that will get done later and a test made to see if we're in the ball park with this before thinking about a sleeve. I did find a picture which shows a plausible 360 degree hemline shape, so I will go with that later, though I'm not sure all pictures agree. It's almost like this is a fictional garment...


Line Starts Over Here

Looking at pictures of Misato's jacket, I get a feeling that the hem line might not be physically possible. It goes up and down and I'm not 100% sure how it all connects as you go from front to back. I think it works, but the problem might just be how all the ups and downs translate into a real garment that you can see all at once.

For starters, I used the cotton tape to define the shoulder sections. You put that between the collar and the main body sections and there shouldn't be as much going on as it appears at first. The collar mostly just stands straight up at the neck line. I want to lay out the other lines (lower back, alignment of the front closure, etc) but this is a good start for this time of night. Now I feel like I did "something" when I'm not going to start the Akari bodice test until at least tomorrow.


Wednesday, July 3, 2013

The Garden of Words!

The Garden of Words blu-ray finally arrived today! This is the Japanese edition (with English subtitles) so it includes the score by Daisuke Kashiwa. There's also a little booklet, which I can't read, but it appears to be the info from the website. And an ad for "Memories of Cinema", which I ordered two copies of, assuming it would be awesome and wanting a reading copy and a copy to put in storage in case anything happens to my reading copy. I don't do that for all books, but since I had to order from Japan, I figured it was a good gamble.


Monday, July 1, 2013

Even More Bodice

I redraped the back bodice pieces, to try to make the lower sections more accurate. We'll see how that turned out when the next test bodice gets made. This time, I did both sides of the back which should make the pattern pieces fit a little better than the old "cut 2", at least after I make whatever adjustments are sure to be needed.

Holiday weekend coming


I dug up these buttons for the Grace Kelly, but I don't think the color will quite work for the Akari. No big deal, since I seem to only have bought a minimum number of these and will have to get more anyway. The buttons will be for the fake button closure on the back, which will somehow conceal a zipper, in keeping with the theory that this is a test garment for the Grace Kelly Project.